
Maintaining your roof is one of the most important parts of home care, but it is also one of the most misunderstood. Many homeowners are now exploring DIY roof restoration as a cost-saving alternative to professional services. If you have an asphalt shingle roof, start with our DIY roof restoration guide. DIY can work in certain situations, but it must be done carefully to avoid causing more harm than good.
So, is DIY roof restoration safe? It can be, on a sound roof, with the right product and the right precautions. Below, SoyFuze explains the real risks, how coatings differ from soy oil rejuvenation, and when to call a pro instead, so you can make an informed, safe decision.
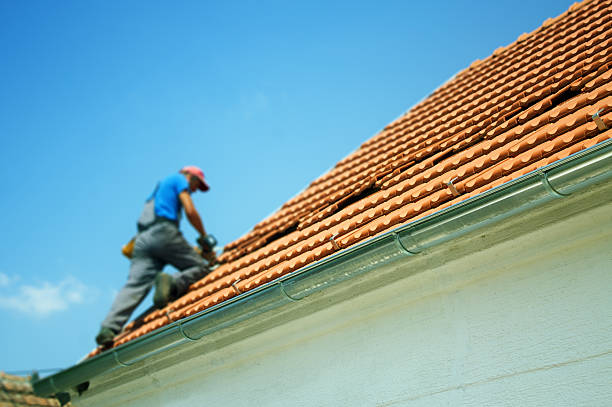
Understanding DIY Roof Restoration
DIY roof restoration refers to the process of cleaning, repairing minor damage, and applying protective coatings or treatments to extend the life of your roof without replacing it.
It is important to understand that restoration is not the same as replacement. Restoration is best suited for roofs that are structurally sound but showing signs of aging such as:
- Light moss or algae growth
- Minor leaks or surface cracks
- Faded or worn shingles
- Dry, brittle shingles that are losing granules
- Reduced water resistance
If your roof has major structural damage, sagging areas, or widespread leaks, DIY methods may not be safe or effective.
Is DIY Roof Restoration Safe?
The safety of DIY roof restoration depends on three key factors:
- Roof condition – Only stable, non-structurally damaged roofs are suitable
- User experience – Working at heights requires caution and basic roofing knowledge
- Correct materials – Using the right product for your roof type is essential
Roof pitch matters too. Roofs under about 6/12 are the easiest to work on safely. Roofs steeper than 8/12 should go to a pro.
A common mistake homeowners make is applying coatings without proper cleaning or inspection. This traps moisture and can accelerate roof deterioration instead of preventing it.
Preparing for DIY Roof Restoration
Before starting any work, preparation is critical. Follow these steps:
1. Inspect the Roof Carefully
Check for missing shingles, soft spots, or leaks inside the attic. If you notice severe issues, DIY work should be avoided.
2. Clean the Surface
A clean roof lets restoration products work properly: coatings need a clean surface to bond to, and rejuvenators need a clean surface to soak into. Remove:
- Leaves and debris
- Moss and algae
- Dirt buildup
A low-pressure wash is recommended. High-pressure washing can damage shingles. Let the roof dry completely before you apply anything.
3. Gather Proper Safety Gear
Never attempt roof work without:
- Non-slip shoes
- Safety harness
- Gloves
- Ladder stabilizer
Falls from roofs and ladders cause many serious home improvement injuries. Always have a partner on site.
Coatings vs. Rejuvenation: Know What You’re Applying
Restoration products range from sealants, primers and surface coatings to penetrating rejuvenators such as soy oil treatments. Coatings sit on top of the shingle; rejuvenators soak in. Either way, results depend on correct application.
- Coatings and sealants form a layer over the roof. Applied over dirt, damage or moisture, they can seal problems in. Check the product label and your shingle manufacturer’s guidance before you coat asphalt shingles.
- Rejuvenators, such as soy oil treatments, are sprayed onto asphalt shingles and soak in to restore flexibility. They don’t form a layer on top.
Here’s how to apply either type safely:
Step 1: Read Instructions Thoroughly
Each product varies. Follow manufacturer guidelines carefully.
Step 2: Apply Only on Dry Weather Days
Avoid rain or high humidity. Moisture can keep a coating from bonding or wash a treatment off before it has done its job. With SoyFuze, spray onto a clean, dry roof and pick a day with no rain in the forecast for at least 24 hours after you spray.
Step 3: Start with Small Sections
Test the product on a small area before applying it across the entire roof. A SoyFuze 32 fl oz sample ($34.99) makes 1 gallon of mixed treatment and covers about 100–150 sq ft, which is enough for a test area.
Step 4: Apply Evenly
Uneven application can lead to patchy protection and early wear. Work from the bottom of the roof up so you don’t step on product you’ve just applied, and plan to finish at your ladder.
Using the product correctly is essential for successful DIY roof restoration, as improper use can shorten roof lifespan instead of extending it.
DIY Roof Rejuvenation: What You Should Know
DIY roof rejuvenation is often confused with restoration, but it usually refers to applying treatments that restore flexibility and moisture resistance to aging shingles.
It is made for asphalt shingle roofs. A soy oil rejuvenator such as SoyFuze, an 80% soy-based concentrate, soaks into aging shingles and:
- Restores shingle flexibility
- Reduces granule loss
- Helps shingles shed rain again
The effect isn’t permanent. SoyFuze extends roof life 5+ years, and a second treatment can follow about 5 years later.
Rejuvenation is one of the more DIY-friendly roof jobs because there’s no tear-off and no coating, just a measured spray. You’re still working on a roof, though, so follow these rules with SoyFuze:
- Mix 1 part concentrate to 3 parts water. Each mixed gallon covers about 100–150 sq ft.
- Spray onto a clean, dry roof with no rain in the forecast for at least 24 hours.
- Stay off the roof for 48 hours after spraying. Freshly sprayed shingles can be slippery.
- Expect it to absorb in under an hour, with the full result in about 3 days (72 hours).
- Bring your own sprayer. SoyFuze packs are concentrate only; no sprayer is included. A pump-up garden sprayer works, or you can buy the SoyFuze Professional Spray Wand separately (from $134.99).
However, not all roofs are suitable for DIY roof rejuvenation. Metal roofs, severely damaged shingles, or roofs with underlying structural issues should not be treated this way.
SoyFuze recommends evaluating roof condition carefully before attempting any rejuvenation process. If your shingles qualify, follow our step-by-step DIY roof rejuvenation guide.
Common Mistakes to Avoid
Many homeowners damage their roofs unintentionally during DIY work. Avoid these mistakes:
1. Skipping Inspection
Applying coatings on damaged roofs traps problems underneath.
2. Using Too Much Product
Too much coating can trap moisture and block ventilation. Too much rejuvenator runs into the gutters and is wasted. Follow the mix ratio and coverage rate for your product.
3. Ignoring Safety Precautions
Falling risk is high—never work alone or without safety equipment.
4. Choosing the Wrong Product
Not all restoration products are compatible with every roofing material.
5. Walking on Freshly Treated Shingles
Wet product makes shingles slippery. With SoyFuze, stay off the roof for 48 hours after spraying.
When to Stop DIY and Call Professionals
Even with proper tools, there are situations where DIY is not recommended:
- Large-scale leaks
- Structural sagging
- Extensive mold or rot
- Shingles at the end of their life: cracked, curling, missing or worn bare of granules
- Steep roofs (over 8/12) or complex designs with many valleys
In these cases, professional help is safer and more cost-effective in the long run. Have a roofer check leaks, sagging or rot. If your roof is sound but too steep or complex to treat yourself, our certified SoyFuze applicators can apply the treatment for you.
Final Thoughts
DIY roof restoration can be a practical solution for minor maintenance, but it requires careful planning, the right tools, and a realistic understanding of your roof’s condition. When done correctly with the right product, it can extend the life of your roof and improve its appearance.
However, homeowners should always approach DIY roof rejuvenation and restoration with caution. Safety should come first, and knowing when to call a pro can prevent expensive mistakes. Have more questions? See the SoyFuze FAQ or call 717-314-2360.